
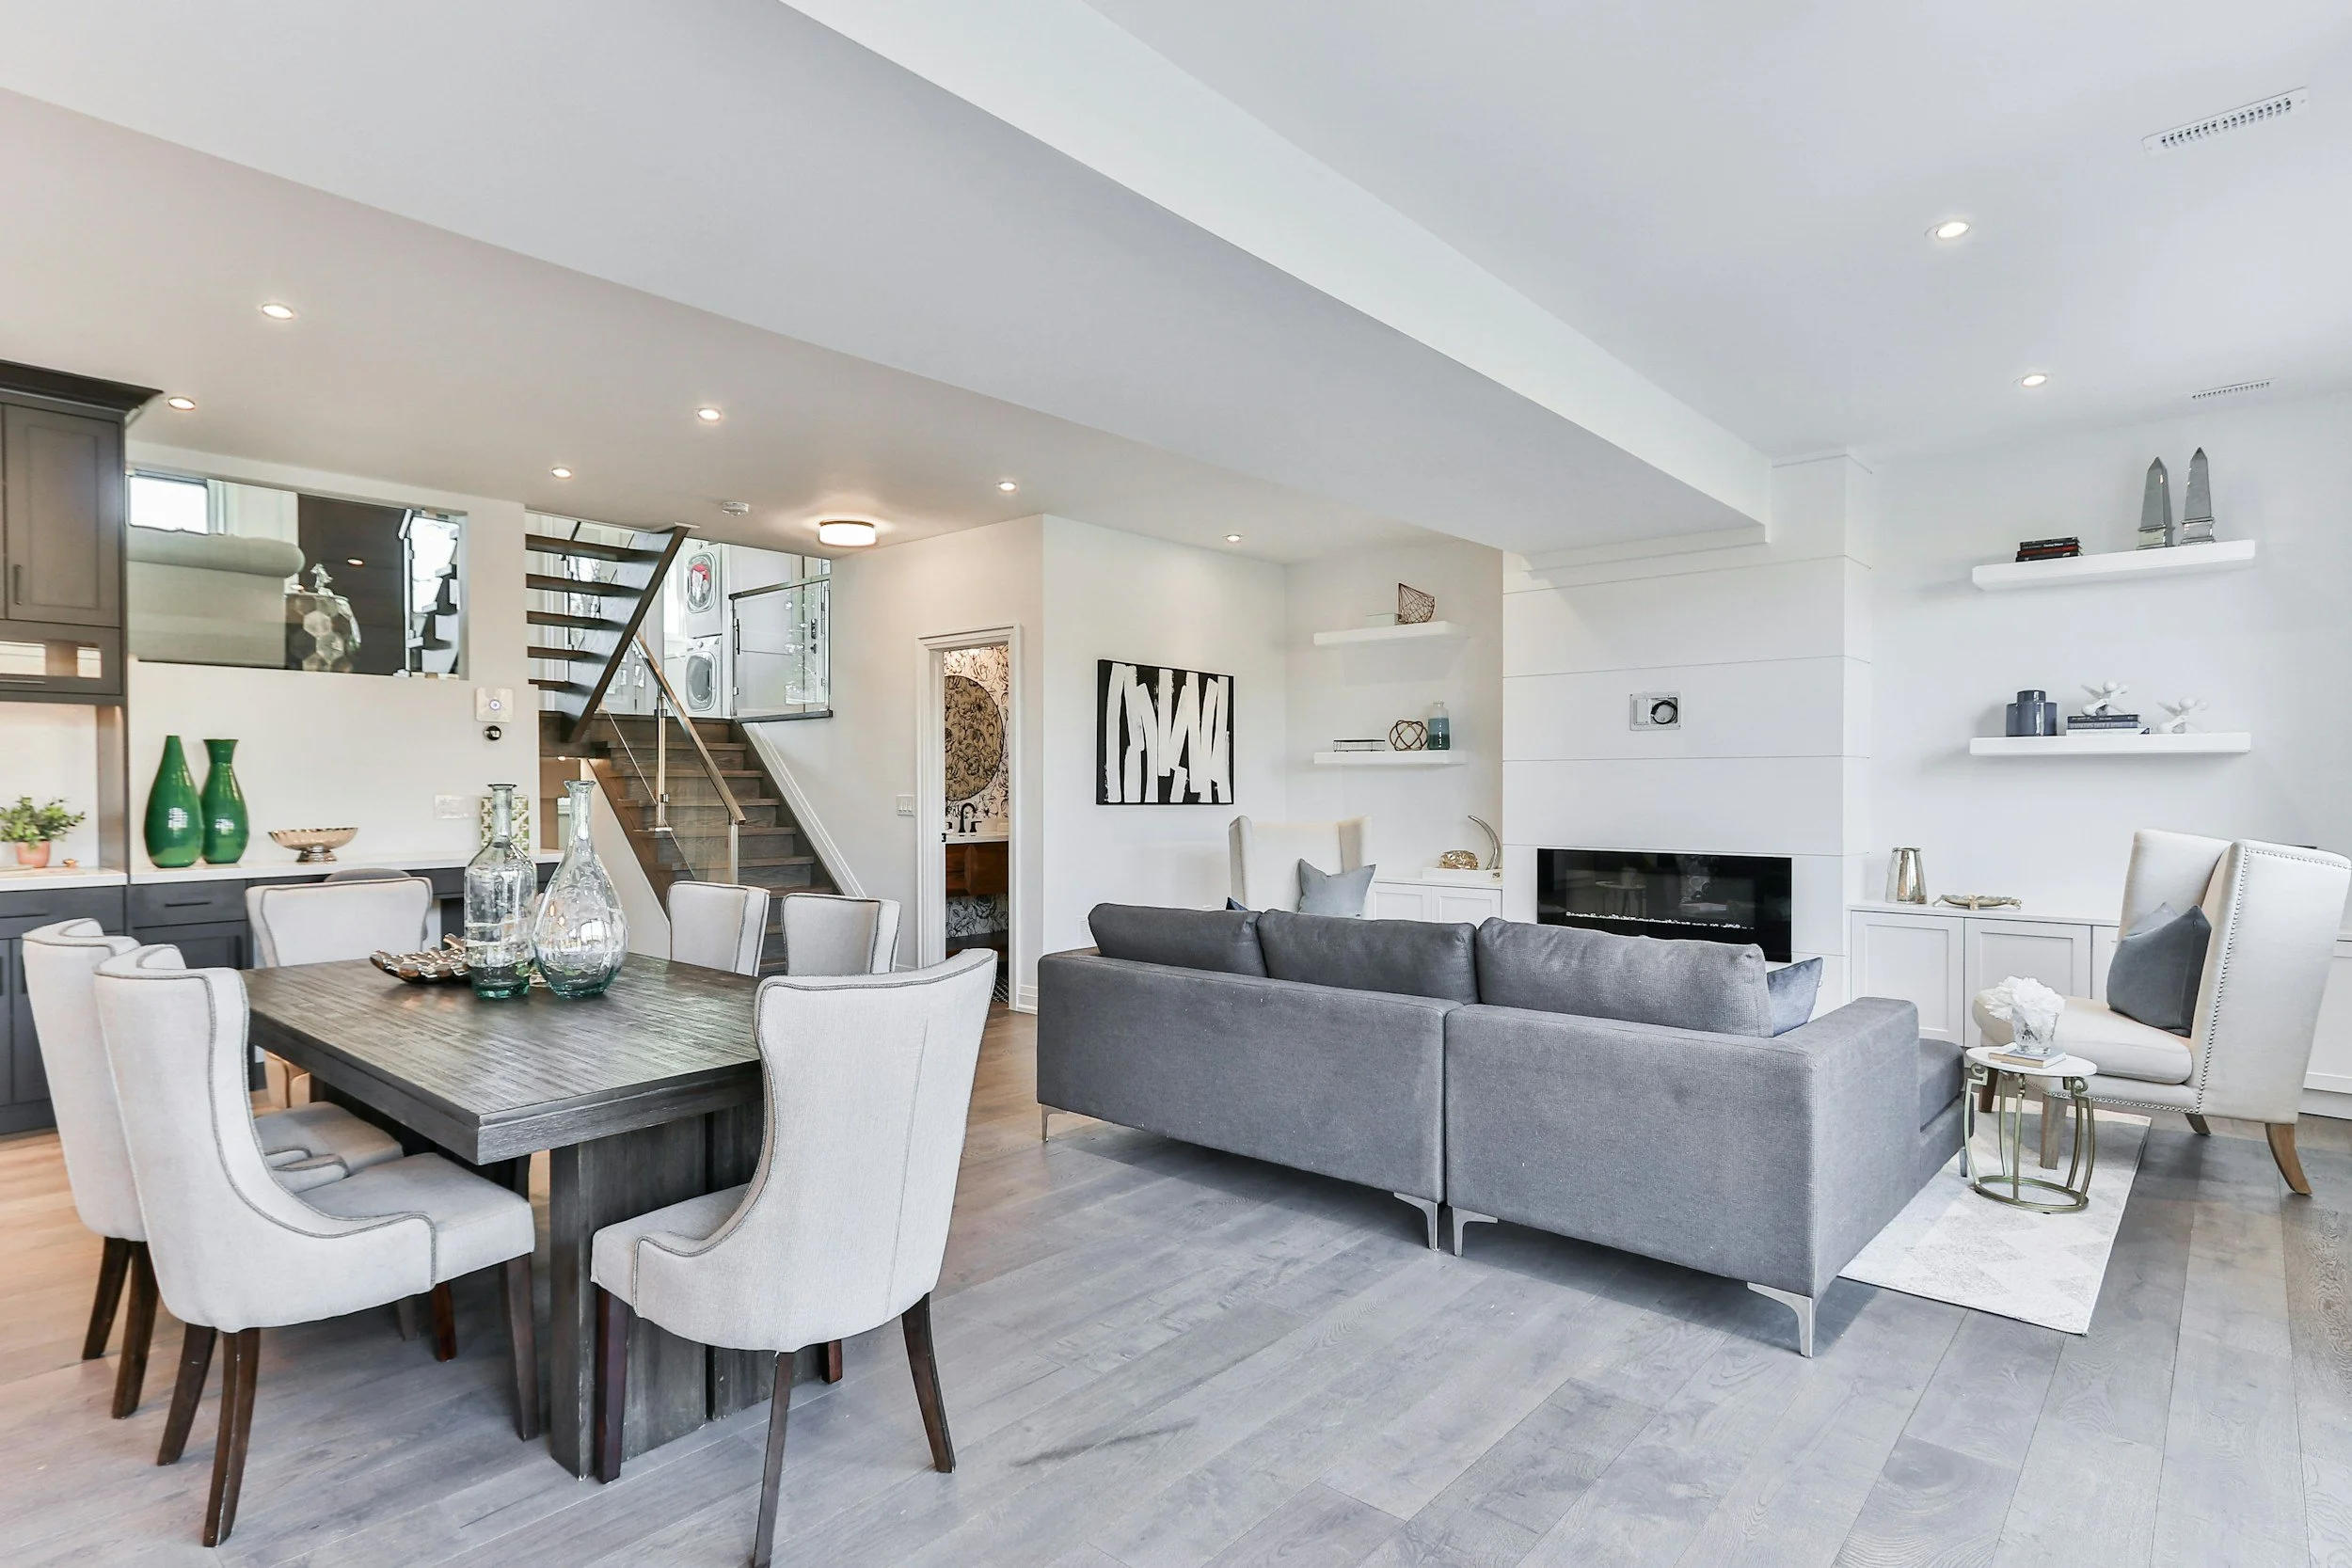
From Foundation to Transformation
Your Remodeling Guide
By: Paramount Construction Group
Dedication
To every homeowner who poured their life savings, sleepless nights, and unwavering hope into transforming a house into a home.
This book is for you — the dreamers, the planners, the risk-takers — who dared to believe that every nail, every decision, and every delay would be worth it.
May this guide honor your courage, your investment, and your belief in what’s possible.
From Foundation to Transformation: Your Remodeling Guide
Chapter 1: So You Want to Remodel Your Home?
Chapter 2: Building Your Dream Team
Chapter 3: Budgets, Blueprints, and the Battle Against Decision Fatigue
Chapter 4: Construction Begins – Demolition, Dust, and How Not to Lose Your Mind
Chapter 5: The Finishing Touches – Paint, Trim, Fixtures, and the Magic of “Almost Done”
Chapter 6: Living in Your Remodel – Maintenance, Mood Swings, and Making It Yours
Chapter 7: The Remodel Retrospective
Prologue
We wrote this book for you — the homeowner standing at the edge of one of the biggest decisions of your life.
Whether you’re remodeling your forever home, preparing to sell, or simply chasing a vision you’ve held onto for years, we see you. We know what it takes — the financial commitment, the emotional toll, the complexity, the uncertainty, and the hope.
We’re developers by trade, deeply embedded in the world of home remodeling. We’ve walked the job sites, reviewed the budgets, handled the delays, and solved the unexpected. But most of all, we’ve listened — to homeowners who felt overwhelmed, under-informed, or taken for granted.
That’s why we wrote this book.
To pull back the curtain on what really goes into a remodel. To give you knowledge, confidence, and control. And to shift your experience from stressful to empowering.
But our vision doesn’t stop with just helping homeowners.
We’re on a mission to change the construction industry itself — from blue collar to white collar. We believe craftsmanship and professionalism can coexist. That transparency, planning, and clear communication should be standard, not a luxury. And that this industry, built by hands, should also be guided by heart and mind.
If you’ve chosen to invest your life savings into your home, this book is our way of honoring that.
You deserve a remodel experience that feels exciting, not exhausting.
Let’s build that future — together.
Chapter 1
So You Want to Remodel Your Home?
(Read This Before You Hire Anyone)
Congratulations. You’ve decided to take on one of the most exciting, expensive, and emotionally challenging adventures of your life. No, not climbing Everest. We’re talking about remodeling your home.
Whether you’re finally tackling that outdated 1980s kitchen, adding a bathroom so your family stops fighting every morning, or turning your garage into a proper office, one thing’s for sure: once you start this journey, your life will not be the same.
Remodeling is Not Just a Project. It’s a Lifestyle.
If you think remodeling is just picking out tile and hiring someone handy with a hammer, buckle up. Remodeling impacts:
Your finances
Your schedule
Your relationships
Your sanity
And we haven’t even mentioned the dust yet.
The Emotional Rollercoaster of Remodeling
Here’s the emotional timeline of a typical remodel:
Excitement: “We’re finally doing it!”
Overconfidence: “It’ll be done in 8 weeks max.”
Denial: “That musty smell is temporary.”
Panic: “Why is the plumber asking me to pick a flange?”
Regret: “Whose idea was this?”
Breakthrough: “It’s finally coming together.”
Euphoria: “It looks amazing. Let’s never do that again.”
Knowing this is half the battle. The rest is preparation.
Before You Start: Ask These 7 Smart Questions
1. Do I really need this remodel—or just want it?
Wanting something isn’t a crime. But clarity matters. Are you solving a real problem (not enough space, outdated layout, dangerous electrical), or are you chasing a Pinterest board fantasy?
2. Have I walked through every inch of the house with a critical eye?
Make a list. Not just of what you want to change, but of what’s working—and what’s not. Functionality always wins over pretty.
3. Do I understand how much this will cost (really)?
Whatever you think it’ll cost—add 20%. Now you’re in the ballpark. If you chose a flashy construction company, add 200% and now you’re in the ballpark. No joke!
4. Am I prepared to make 1,000 decisions—big and small?
From where outlets go to the exact sheen of paint, you’ll be decision-making like it’s your full-time job.
5. Can I live in a construction zone (or afford not to)?
Dust will coat everything. Walls may disappear. You might go weeks without a working kitchen. Know your threshold before you begin.
6. Do I trust myself to say “no” to upsells, detours, and shiny objects?
Scope creep is real. Stay focused or the budget will balloon.
7. Do I have a clear “why”?
Why now? Why this space? Why this scale? A strong why will anchor you when the drywall dust settles.
Real Talk: Remodeling Will Test Your Patience
Let’s be honest: things will go wrong.
A wall you thought could go can’t.
The tile you love is backordered for 12 weeks.
The contractor finds termites.
You forget you have HOA approvals.
You are not failing. This is part of the deal.
The best remodels don’t go perfectly. The best remodels are the ones where homeowners stay flexible, informed, and communicative.
Three Mindsets That Make Remodeling Easier
1. Curiosity over Control
You will be asked about things you’ve never heard of—like sistering joists, or mixing valves, or Level 5 drywall. Don’t fake it. Ask questions. A good contractor respects a curious homeowner.
2. Flexibility over Perfection
There will be trade-offs. Budget vs. timeline. Finish vs. function. Perfection is a myth—aim for “beautifully livable.”
3. Trust, but Track
Trust your team—but keep records. Every change order, payment, and conversation. Not to micromanage, but to stay informed. Your future self will thank you.
So What Should You Do First?
Create a Vision Folder: Yes, you can use Pinterest or a shared folder. But group your ideas by room. Start to define what you love—and what you don’t.
Set a Budget (and a Buffer): Decide what you can afford, and subtract 20% for a safety net. If your top number is $100k, try to plan for $80k.
Interview Contractors Early: Get referrals. Look at their work. Ask hard questions. If something feels off, trust your gut.
Get Comfortable with Disruption: Make a plan for your pets, your kids, your routines. This isn’t just about building a space—it’s about managing your life during the build.
Communicate with Anyone Sharing Your Home: Spouses. Teens. Parents. Talk now—about schedules, bathrooms, dust, and budgets—before it becomes a sore spot mid-demo.
You’re the Boss—But You’re Also the Partner
You’re not just hiring a contractor. You’re entering a relationship. The clearer you are about your expectations, your goals, and your priorities, the better your experience will be.
You don’t need to know everything. You just need to know enough to ask smart questions, stay grounded in your goals, and lead with clarity.
Chapter 2
Building Your Dream Team
(And Avoiding a Construction Nightmare)
If you’re thinking of remodeling your home and imagining doing it with just a handyman and a Pinterest board, let’s gently press pause. Remodeling—especially the kind that involves walls, permits, plumbing, and people—requires a licensed and experienced team.
Not necessarily a big team, but the right one.
This chapter is all about helping you figure out who you need, what they do, when to bring them in, and how to spot the greats from the disasters.
The Core Crew: Who’s Who in a Remodel
Here’s a breakdown of the key roles on your remodel dream team.
1. The General Contractor (GC)
What they do:
The GC is the quarterback of your remodel. They manage the entire construction process. That includes hiring and overseeing subcontractors, ordering materials, scheduling inspections, and making sure the project runs on time (more or less) and on budget (give or take).
When to bring them in:
As soon as you’ve got a rough idea of your scope and budget. They help translate your dreams into timelines and realities.
How to spot a good one:
Communicates clearly and promptly
Is licensed, insured, and can prove it
Has solid references (that you actually call)
Provides a clear, itemized estimate—not vague numbers
Has a calm energy (trust us, this matters at week 9 of living without a sink)
2. The Architect
What they do:
Designs the structure and layout of your remodel. If you’re moving walls, adding square footage, changing the footprint of your home, or dealing with tricky city codes—this is your person.
When to bring them in:
Before permits. Before bids. Ideally before you start imagining where your couch will go in the new space.
How to spot a good one:
Asks smart questions about how you live
Balances beauty, function, and cost
Understands your city’s zoning rules
Plays well with others (G.C., city inspectors, your spouse)
Doesn’t roll their eyes when you say “open concept”
3. The Designer
What they do:
Turns the blueprint into a space you actually want to live in. They choose finishes, fixtures, paint, lighting, and layout details that make your remodel feel cohesive and complete.
When to bring them in:
Early is ideal—especially before construction begins. Designers often prevent costly mistakes like putting the fridge where the oven should go, or choosing the wrong lighting for the space.
How to spot a good one:
Listens more than they talk
Shows you ideas in your style, not theirs
Understands timelines and ordering delays
Has trade access to vendors (a hidden perk)
4. The Structural Engineer
What they do:
Confirms that your remodel won’t cause your house to fall down. Literally. They calculate load-bearing requirements if you’re removing walls or adding stories.
When to bring them in:
When your architect or GC says “we need engineering.” This is not optional. This is science. And gravity.
How to spot a good one:
Doesn’t overcomplicate simple jobs
Responds fast with calculations
Works well with architects and the city
Specialty Subcontractors: The Unsung Heroes
Once construction begins, your GC will call in specialists for specific tasks:
Electricians (wires, lighting, panel upgrades)
Plumbers (pipes, drains, water heaters)
HVAC techs (heating, cooling, ventilation)
Tile setters, drywallers, painters, floor installers
Cabinet builders, countertop fabricators, finish carpenters
These folks are highly skilled—and sometimes extremely booked. Your GC manages them, but it helps to understand their role and timeline so you can track progress with confidence.
Who You Don’t Need (Usually)
A “friend who did their own remodel” — Valuable for advice. Not for planning your project.
The contractor who says “permits are for suckers” — Run. Fast.
A bargain-basement architect who only draws boxes — If it looks boring on paper, it’ll feel boring in real life.
The design diva who makes you feel small — If you’re afraid to say “I hate that tile,” they’re not the right fit.
Tips for Interviewing and Hiring Your Team
Ask how they prefer to communicate.
Text? Email? Weekly meetings? Make sure it works for you.
Get references—and actually call them.
Ask past clients what went right, what went wrong, and how the pro handled it.
Look for chemistry. You don’t have to be best friends. But you should feel respected, heard, and confident.
Start with small asks. Ask for an estimate or sample drawing. Their response time tells you a lot.
Discuss money early and clearly. If someone dances around numbers, they’ll likely dance around accountability too.
The “One Team, One Dream” Mentality. The best remodels happen when your GC, designer, and architect collaborate—not compete.
A great designer listens to the architect’s constraints.
A great GC respects the design and protects the budget.
A great homeowner (that’s you) keeps everyone aligned with clear goals, prompt decisions, and calm energy.
Treat your project like a team sport. You’re the owner, but you need a strong captain, a smart playbook, and people who know their roles.
Warning Signs to Watch For
Vague timelines (“It depends” is not a timeline)
Cash-only deals (Never. Ever.)
Pushy energy (“Sign now before prices go up!”)
No portfolio or references
Overpromising (“We can finish in 3 weeks, easy”)
Good people are often booked—but the wait is worth it. Bad hires will cost you more than just money.
Quick Checklist: Before You Hire Anyone
Ask for license, insurance, and a recent project portfolio
Get 2–3 bids for big-ticket work (or more if your project is larger and complex)
Confirm they’ve worked on similar scope projects
Review contracts and scope of work in writing
Know how they handle change orders
Make sure you like them—you’ll be talking a lot
Chapter 3
Budgets, Blueprints, and the Battle Against Decision Fatigue
Welcome to the phase where your Pinterest board starts sweating.
You’ve hired your team, shared your vision, and now… it’s time to plan. This chapter covers how to budget smart, plan well, and avoid decision fatigue—the silent remodel killer that sneaks in somewhere between “What faucet should we use?” and “I don’t care anymore, just pick something.”
This is the heart of your project. And it’s where the biggest wins—or most painful regrets—can happen.
Step One: Get Honest About the Budget
Let’s clear this up early: You will spend more than you thought.
Almost every homeowner does. But that doesn’t mean you can’t control the numbers.
The goal isn’t to build your dream remodel on a fantasy budget—it’s to build a beautiful, functional, lasting home within a budget that’s grounded in reality.
Here’s how to start.
Know Your All-In Number
Ask yourself:
What is the maximum I’m willing to spend—truly?
Does this number include Appliances? Permits? Landscaping?
How much contingency can I afford if things go wrong?
Write it down. This is your all-in number. Tattoo it on your brain. Protect it with your life.
Break It Down Like a Pro
Here’s a high-level example of how a $150,000 major remodel might shake out:
55% Construction Labor and Materials
10% Design and Architecture Fees
10% Permits, Engineering, and City Fees
15% Fixtures, Finishes, and Appliances
10% Contingency (you’ll need it)
The exact percentages shift depending on your project, but this gives you a sense of what hides behind the big number.
Don’t Confuse Cost with Value
Some of the most expensive upgrades offer the least return on investment.
A custom wine room? Sexy. But maybe not worth cutting insulation or solid wood cabinets.
Focus on:
Layout improvements (you feel these every day)
Storage solutions (you appreciate them forever)
Natural light (cheaper than therapy)
Durability (especially in bathrooms and kitchens)
Step Two: Make a Real Plan (Not Just a Mood Board)
This is where you and your team turn ideas into instructions.
Floor Plans and Elevations
Don’t skip this. A rough sketch on a napkin doesn’t count. You want scaled, labeled, real plans that:
Reflect your daily habits (Do you cook? Work from home?)
Solve real pain points (Storage, space, layout bottlenecks)
Consider traffic flow, sightlines, and lighting
Think through how you live, not just what you like.
Materials Selection
This is where decision fatigue begins. Every finish needs to be chosen:
Flooring
Tile
Countertops
Cabinets
Paint colors
Hardware
Plumbing fixtures
Lighting
It’s a lot. But here’s how to survive it:
Group decisions by room
Narrow choices to 2-3 options max
Make the biggest decisions first (e.g. flooring, cabinets)
Trust your designer or hire one if you haven’t already
And please—order early. Delays are real. The faucet you love might be on a 12-week backorder. Plan ahead.
Think About the Invisible Stuff
Everyone gets excited about backsplashes. No one talks about insulation or venting.
But they matter.
Ask your GC:
Will we need to upgrade plumbing or electrical?
Are we improving insulation or waterproofing?
Is the HVAC system impacted?
Where will vents go?
What about lighting design?
Invisible choices affect how your home feels, functions, and holds up over time.
Step Three: Guard Your Energy (And Your Sanity)
Remodeling is a marathon. The further you go, the harder the decisions feel. Not because they get more complicated—but because you’re tired.
This is decision fatigue—the very real psychological drain from having to make too many choices, too often, without rest.
How to Fight Decision Fatigue
Set weekly decision days. Don’t make every decision in real time. Batch them.
Delegate. Let your designer or GC choose for you sometimes. Give them clear guidelines and trust them.
Remember: “Perfect” is not a requirement. Good, timeless, durable > trendy, pricey, and fragile.
Step away when overwhelmed. A 10-minute walk can save you from a 10-year regret.
Create a decision journal. Write down what you picked and why. This helps reduce second-guessing later.
Tip from the Field: Don’t Let Pinterest Become Your Project Manager
You saw a bathroom on Instagram. It was stunning. Marble everywhere. Perfect lighting. Brass details.
What you didn’t see: the $90,000 price tag, 17-week lead times, or the fact that the family can’t use that tub because it’s too deep for the water heater.
Inspiration is a starting point—not a shopping list.
When to Say No (and Mean It)
Your team may push you toward upgrades. Some are worth it. Some aren’t.
Say no when:
It’s outside the budget and you don’t care deeply about it
It’s a trendy item that won’t age well
It’s a last-minute change that derails the schedule
It doesn’t solve a real problem
Say yes when:
It improves daily life
It adds functionality or long-term value
It solves a future headache now
It makes your heart genuinely happy
Final Thought: Plan Like a CEO
You’re not just a homeowner. You’re now the project CEO.
Good CEOs:
Set the vision
Hire a great team
Allocate resources wisely
Make informed decisions
Don’t micromanage, but they do hold people accountable
Your home deserves that level of leadership. You’ve got this.
Chapter 4
Construction Begins – Demolition, Dust, and How Not to Lose Your Mind
If planning is the calm before the storm, this chapter is the moment the clouds burst.
Your drawings are approved. Your fixtures are ordered. You’ve said goodbye to your sanity (just for a while). Construction has officially begun.
In this chapter, we cover what really happens during this phase—from demolition to framing to the daily chaos of workers, sawdust, and a million questions. Most of all, we’ll teach you how to stay calm, stay involved, and stay out of the way (strategically).
Welcome to the most exciting, most maddening, and most progress-packed part of the journey.
The Demolition Phase: Yes, It’s Supposed to Look Worse
The first few days are deceptively thrilling. Cabinets come out. Walls come down. Tile gets smashed. It feels productive.
Then, you walk in and think:
“Did I make a mistake?”
You didn’t. You’re just seeing the middle of the story, and the middle always looks messy.
Key Tips During Demolition:
Expect surprises. Dry rot. Hidden pipes. Lazy work from the ‘80s. It happens.
Be available. Your GC may call you to approve a change or expense quickly.
Take photos. Document what’s behind the walls before they’re sealed back up—it could help you later (especially for plumbing/electrical).
Demo Golden Rule: Don’t change the scope unless it solves a real problem or gives you a real upgrade.
Dust, Noise, and the Disruption Olympics
Let’s not sugarcoat it—construction is inconvenient.
Even with a respectful crew, here’s what’s likely to happen:
Your floors will be protected but not pristine.
Your home will vibrate like it’s angry.
That one loud tool will always start the second your Zoom meeting begins.
Your dog may never stop barking.
Your neighbor may “just want to ask” how long this will take. Every week.
Here’s how to survive the mess:
Move out if possible during heavy phases—especially flooring, drywall, or if you’re doing a full-gut remodel. If you are unable to move out, consider the following:
Seal off the work zone. Zip walls, plastic barriers, and air filters are your friend.
Use HEPA air purifiers outside the zone, especially if you have kids or allergies.
Invest in white noise machines for sanity.
Structure, Systems, and the Invisible Progress
After demo, the work becomes less visible—but no less important.
This is the stage where your remodel gets a backbone:
Framing: Walls go up (or move), windows get reframed, ceilings change.
Mechanical, Electrical, Plumbing (MEPs): HVAC lines are rerouted, outlets are added, pipes are upgraded.
Inspections: City inspectors review all the changes before they’re closed up.
This phase can feel slow, but it’s essential. Be patient. You’re building a home that lasts.
Pro Tip: Ask for a walkthrough before drywall. Walk your home with your Contractor and make sure:
Every outlet is in the right place
Every switch is intuitive
Lighting is where it should be
Plumbing is correctly placed
It’s cheaper and easier to change now than later.
Drywall: When Hope Returns
Drywall changes everything. It marks the shift from “construction site” to “house again.”
Walls go up. Rooms take shape. You begin to imagine paint, furniture, and family gatherings. This is when you start to believe again.
Drywall Phase Tips:
Expect dust—lots of it.
Schedule a deep clean after taping, mudding, and sanding.
Don’t panic if it looks uneven before paint—it gets better.
Your Role During Construction: Present, But Not Problematic
You are the homeowner—not the project manager.
Here’s how to show up effectively without driving your team crazy.
DO:
Have regular check-ins. Weekly site meetings or updates from your Contractor keep you informed.
Use a shared tracker if you prefer, e.g., Google Sheets can keep everyone aligned.
Ask questions, not accusations. “Can you walk me through why we chose this route?” is always better than “Who approved this disaster?”
Celebrate progress. Say thank you. Recognize great work.
DON’T:
Micromanage every decision on-site
Drop by unannounced every day
Change your mind without understanding the impact
Let Instagram redesign your kitchen halfway through
Change Orders: The Price of Changing Your Mind
Let’s talk money. Again.
Anytime you change a decision after work has started—or your GC finds something unexpected or new —you’ll likely receive a change order.
This is a formal document outlining:
What’s changing
Why it’s changing
What it will cost
How it affects the timeline
Don’t be afraid of change orders. But don’t accept them blindly, either.
Always ask:
Is this change necessary?
Can we solve this another way?
What happens if we don’t make this change?
Most importantly: approve them in writing. Every. Single. Time.
Common Construction Curveballs (and How to Catch Them)
Here are a few common surprises during this phase—and how to handle them like a pro:
1. “We opened the wall and found mold.”
Solution: Fix it right, document everything, and check your insurance.
2. “The plumbing is old and not up to code.”
Solution: Upgrade it now. It’s painful, but it future-proofs your home.
3. “You’re out of tile.”
Solution: Order 15% more than you need. Always. If you didn’t, check for alternate lots.
4. “The inspector failed the electrical.”
Solution: Stay calm. It’s fixable. This is why you hire licensed professionals.
How to Handle Delays Without Losing Your Mind
Delays are normal. Even the best teams face them. Here’s how to handle them:
Expect at least one major delay.
Build in buffer time in your mental calendar.
Don’t rush the finish. It’s tempting to push—but the last 10% of quality is often in the details.
Keep communication open. Silence breeds frustration. Stay in the loop.
Progress vs. Perfection
Here’s the truth: Nothing will go exactly as planned. Something will be a little off, delayed, or different than expected.
The key is knowing the difference between:
A mistake worth correcting (wrong tile installed? Fix it.)
A compromise worth accepting (window is 1 inch off-center? No one will notice.)
Pick your battles. Focus on the whole picture. And trust your instincts.
The Messiest Middle, The Brightest Light
Construction is the middle of the story—the chapter where the character (that’s you) is tested. It’s loud. It’s imperfect. It’s real life with wires and nail guns.
But it’s also where your vision becomes real.
Keep showing up. Keep asking smart questions. Keep the end in sight.
Because once the dust clears, the walls are painted, and the floors are mopped—you’re going to walk into a space that you helped create. And nothing beats that feeling.
Chapter 5
The Finishing Touches – Paint, Trim, Fixtures, and the Magic of “Almost Done”
You’ve made it through the noise, the surprises, the decisions you second-guessed at 2 a.m., and the day your living room was nothing but wires, wood, and wild hope.
Now? You can see your home coming to life. The walls are closed up. The rooms have shape. You’re no longer pointing at empty spaces saying, “The vanity goes there.” The vanity is actually there.
This chapter is where everything starts to sparkle—literally and emotionally. It’s the part of the remodel that feels like a montage in a movie: paint goes on, light fixtures get installed, cabinets are leveled, floors are cleaned, and everyone starts to smile again.
But don’t be fooled by the beauty—this is also the phase where small details matter most. And this is where many homeowners lose patience just a bit too soon.
So let’s talk through it. Fully. Honestly. And with a dash of humor.
“Almost Done” Is Not the Same as “Done”
One of the biggest mistakes homeowners make at this stage? They start mentally moving in before the work is actually finished.
The cabinets are up, the faucets are in, and the paint is dry—but there’s still:
Touch-ups to complete
Fixtures to adjust
Missing hardware to install
Paint lines to clean
And a little thing called the punch list (we’ll get there soon)
In short: Don’t book the housewarming party just yet.
Paint: More Powerful Than People Realize
Paint is one of the most emotionally satisfying moments in any remodel.
Rooms that looked like drywall mazes suddenly look finished. Color gives personality. Light reflects. And everything just… pops.
Tips for Paint Success:
Test swatches in different light. A color in the showroom may look very different on your actual walls at 7 a.m. and 7 p.m.
Choose finish wisely:
Flat/matte: hides imperfections, best for ceilings and low-traffic walls
Eggshell/satin: durable and wipeable, perfect for most living spaces
Semi-gloss: kitchens, baths, trim
Use painter’s tape to mark touch-ups during your walkthroughs. Your crew may miss them, but your eye won’t.
And yes, you’re allowed to cry happy tears when the color hits just right.
Trim and Details: Where It All Comes Together
Trim is like the punctuation of your remodel—it defines, outlines, and sharpens the story your home is telling.
This includes:
Baseboards
Crown molding
Window and door casings
Decorative wall paneling
Built-ins or shelving
What to Look For:
Clean mitered corners (no gaps)
Smooth caulking (it should disappear, not draw attention)
Paint consistency (no drips or patchy areas)
It’s the quiet stuff that makes your remodel feel polished. When trim is done right, no one notices. When it’s done wrong, it’s all anyone sees.
Fixtures, Lighting, and “The Jewelry” of Your Home
This is when your remodel gets glam.
Your lighting goes in.
Faucets are mounted.
Drawer pulls are installed.
Mirrors hang.
Appliances slide into place.
Every piece of hardware and lighting is a finishing note—like jewelry on a great outfit. It may not be structural, but it sets the tone and finishes the look.
Tips to Nail the Look:
Consistency matters. Mixed metals are okay—if intentional. If your kitchen is chrome, brushed brass may feel out of place unless it’s balanced elsewhere.
Watch placement. A towel bar too close to the toilet or a vanity light that blinds you in the mirror? A tiny shift makes a big difference.
Keep a copy of the lighting and plumbing plan with clear notes about what goes where. Installers aren’t mind readers—and you don’t want your hallway pendant ending up in the pantry.
The Punch List: Your Final Line of Defense
Ah, the punch list. Not a boxing move—a checklist of all the small items that still need to be completed, repaired, or adjusted before you hand over that final payment.
Your Contractor should walk the space with you and identify:
Paint touch-ups
Cabinet alignment fixes
Caulking gaps
Loose hardware
Doors that don’t close properly
Outlets that aren’t live
Pro Tips:
Don’t rush this.
Bring a fresh pair of eyes—or a friend who will be brutally honest.
Write everything down, even if it feels nitpicky.
Set a timeline for completion and hold your team to it.
This is your home. It should be right.
The Final Clean: It’s Not Just Sweeping Up
Construction dust is the glitter of the remodeling world—it hides everywhere.
A proper post-construction clean includes:
HEPA vacuuming of every surface (especially vents and ducts)
Wipe-down of walls, windows, floors, and cabinets
Cleaning inside drawers and cabinets
Washing windows inside and out
Removing stickers, residue, and adhesive
Mopping with the right product for your new flooring
Yes, you should hire pros. And yes, it’s worth every penny.
The Emotional Dip: Don’t Worry, It’s Normal
After all this work, it’s not uncommon to feel a strange mix of excitement, exhaustion, and a dash of “Is this it?”
You’ve been living with anticipation for months. Your days revolved around decisions. Your house was full of noise, people, and progress.
Now? It’s just… quiet. Done.
This is where many homeowners find themselves looking around and saying, “Wait, what do I do now?”
Here’s the answer: You enjoy it. You settle in. You take a breath. And maybe, if you’re like most of us—you start dreaming up your next little project.
But for now, sit on that new bench, run your hands across the countertops, flip the switch on that fancy pendant light, and know: you made this happen.
Before You Pop the Champagne: Final To-Dos
Final inspection or walk-through with your city (if required)
Collect all warranties, manuals, and care instructions
Set reminders for future maintenance (grout sealing, HVAC filters, etc.)
Leave a review if you loved your Contractor
Store leftover materials (tile, flooring, paint) for future touch-ups
Chapter 6
Living in Your Remodel – Maintenance, Mood Swings, and Making It Yours
So here you are—officially moved back in, furniture in place, new lighting aglow, your fridge humming with groceries instead of construction dust.
But something feels… off.
You expected magic. You expected to feel like you were on a home makeover show. Instead, you’re navigating a new kind of reality: one where your dog slides across your brand-new floors, your toddler discovers marker on the fresh-painted walls is permanent, and the faucet you loved online suddenly splashes water everywhere like it’s trying to put out a fire.
Welcome to life after the remodel.
This chapter is about what happens once the dust settles—literally—and how to live in your newly transformed space without losing your sanity, your sense of humor, or your love for your home.
The Remodel Hangover (It’s Real)
After the adrenaline of decision-making, budgeting, and seeing transformation day after day, suddenly living in a finished home can feel… weird. Or even a little underwhelming.
You might find yourself nitpicking every tiny imperfection:
“Was that scratch always there?”
“Why does that cabinet door squeak?”
“Why didn’t we choose the other tile?!”
This is normal.
You’re coming off a months-long high where every decision was critical and every day held visible progress. Now that you’ve landed, your brain doesn’t know what to do with the silence.
Give it a few weeks. Live in the space. Let it breathe. Let you breathe.
Then—slowly—you’ll begin to fall in love with your home not because of what it looks like, but because of how it works for you.
Maintenance: The Stuff No One Talks About
Here’s the truth: your remodel won’t stay shiny and flawless unless you take care of it. Just like a car needs oil changes, your house needs upkeep.
The 10-Minute Weekly Checkup:
Wipe down bathroom fixtures to prevent hard water buildup.
Check under sinks for early leaks.
Run your hand along grout and caulk lines—if it’s cracking, it’s time to seal.
Gently vacuum vents and registers to keep your HVAC system happy.
Open and close windows and doors—catch sticking before it becomes a problem.
Monthly Mini-Maintenance:
Clean your garbage disposal (citrus peels + ice cubes work wonders).
Deep clean your range hood filters.
Rotate couch cushions so one side doesn’t flatten into despair.
Wipe down baseboards before dust becomes wallpaper.
Once-a-Year Musts:
Reseal grout or stone (as recommended by your installer).
Service your HVAC (especially before summer/winter extremes).
Clean behind appliances—yes, even the fridge.
Drain your water heater to clear out sediment.
It’s not glamorous, but it keeps your remodel from falling apart faster than your patience on demo day.
Decorating After the Remodel: Wait, Don’t Rush
The instinct is strong: to hang every frame, roll out every rug, and decorate every wall within 48 hours of moving back in. But pause.
Live in your space first.
Your new home will tell you how it wants to be lived in:
That sunny corner may become your favorite morning coffee spot—maybe a reading chair lives there, not a sideboard.
Your open floor plan might feel better with one giant rug instead of two small ones.
That statement chandelier? It might be competing with your view. Or it might be perfect.
Let function guide beauty. Let real life shape how you design.
And don’t be afraid of blank walls. They’re just waiting for the right story to come along.
Things Will Break. You Will Survive.
Even in a brand-new space, things go wrong.
The paint chips when your kid kicks off their shoes (every single day).
A screw comes loose in the drawer pull.
Your beautiful engineered wood floors show every scratch like they’re trying to keep score.
The fix: Have a homeowner’s toolkit ready.
Here’s what you need:
Touch-up paint in labeled containers (don’t toss the leftovers!)
A set of basic tools: screwdriver, level, tape measure, pliers
Wood markers for scratch repair
Extra caulk and grout
Appliance manuals and warranty info in one place (a binder, a digital folder, anything but a shoebox)
Don’t Remodel and Forget: Set a Digital Reminder System
Your remodel should age like fine wine—not like forgotten lettuce in the fridge.
Set calendar reminders for:
HVAC service every 6 months
Resealing stone or grout (check your product specs)
Checking batteries in smoke/CO2 detectors
Washing high windows and skylights
Flipping rugs or pads to prevent wear
You don’t have to do it all today. But future-you will be very grateful.
The Emotional Arc of “Home”
Remodels change houses—but they also change people.
You now:
Know what a soffit is
Have opinions about grout
Can spot crooked trim from a mile away
You’ve been through delays, noise, decision fatigue, and possibly a full existential crisis over paint swatches. And yet… here you are. Stronger. Smarter. Still standing.
Your home will never be perfect. And that’s okay. It wasn’t built to be perfect—it was built to hold your messy, beautiful life.
Permission Slip: Enjoy the Damn House
Yes, there will always be a new project on the horizon. A new pillow to buy. A better drawer organizer. An idea for the laundry room you didn’t touch this time.
But for now?
Sit down. Pour something cold or hot or fizzy. Put your feet up. Turn on the light you waited six weeks for. And whisper to yourself:
“I did it.”
Because you did. And it’s beautiful. Not because it’s magazine-worthy (although maybe it is). But because it’s yours
Chapter 7
The Remodel Retrospective
What You’ll Be Glad You Did, What You’ll Never Do Again, and What You’re Already Planning Next
You did it. You survived the chaos, confusion, and coffee-fueled conversations about crown molding. You’re officially on the other side of a major remodel. And just like after a long hike, a wild wedding, or surviving IKEA furniture assembly as a couple, it’s time to pause and reflect.
This chapter is your space to look back at what went right, what went sideways, and what you now know never to do again—unless you’re aiming for another round of late-night panic-Google searches about tile adhesives.
What You’ll Be Glad You Did (Even If It Didn’t Seem Like It at the Time)
Spent Money on Quality Materials
There was a moment when choosing the cheaper faucet seemed like the practical thing to do—until you remembered that this faucet will be touched multiple times a day for years. Investing in things you use constantly (cabinet hardware, flooring, countertops, appliances) pays off in comfort, durability, and peace of mind.
Homeowner Wisdom:
“We splurged on soft-close drawers. I’d do it again a thousand times. It’s like the house apologizes to me every time I’m in a bad mood.”
Insisted on a Clear Scope of Work (SOW)
That document wasn’t just a formality—it was your remodel’s Bible. Everything that got done, didn’t get done, or went into negotiation later? All came back to the scope of work. If you stuck to it, you dodged some major headaches.
Pro Tip:
If you didn’t insist on one this time, you will next time.
Made Space Livable, Not Just “Pinterest-able”
Designing for real life—charging stations in the kitchen, hooks at kid height, a second laundry hamper—may not look glamorous, but it makes every day smoother. And smoother days? That’s the remodel jackpot.
What You’ll Never Do Again (And That’s a Good Thing)
1. Choose the Paint Color on the Spot
Ah, the seductive power of a paint chip under fluorescent lighting at 7:30 p.m. Let this be a lesson burned into your soul: always test paint in your actual space, under natural light, before making a final call.
You’ll never forget “Seafoam Calm” that looked like toothpaste or “Elegant Taupe” that dried like wet cardboard.
2. Assume the Timeline Is Real
We get it. You believed. You had the spreadsheet, the contractor’s verbal promise, and a deep, irrational faith. But drywall delays, backordered tile, and someone’s cousin’s plumbing emergency had other plans.
Lesson learned:
Add 25% more time than estimated. Then make peace with it.
3. Say “Yes” Without a Drawing
If you agreed to something without a drawing—be it a custom built-in, a wall bump-out, or a lighting configuration—there’s a good chance you got something you didn’t fully imagine. Or worse, something that now makes you wince every time you walk by.
Design with visuals or don’t design at all.
What You’re Already Planning Next (Don’t Deny It)
1. “Let’s Just Update the Backyard…”
You’re standing at your new kitchen window, looking out at your sad little patio table. The grass is patchy. The fence is leaning. You find yourself saying, “It doesn’t have to be a big project…” (This is how it starts.)
2. “We Could Add a Guest Suite Eventually.”
Now that you’ve dipped your toe into construction, the idea of building an ADU or converting the garage doesn’t sound so outrageous. In fact, it sounds…smart. And kind of exciting.
3. “Next Time, I’ll Know Exactly What I Want.”
The first remodel teaches you what’s possible. The next one? That’s where you shine. You’ve got the scars, the skills, and the supplier contacts. You’ve graduated from Remodel Rookie to Experienced Warrior.
Tips for Documenting the Lessons (So Future You Thanks Present You)
You think you’ll remember. You won’t. Not in five years when you’re doing the bathroom and can’t recall which grout color you used in the kitchen or which tile brand you loved.
Create a Homeowner’s Remodel Guidebook:
List of products + where you bought them
Paint colors (brand, sheen, room)
Photos of behind-the-walls (take pics before drywall!)
Warranty info
Notes on what you’d do differently next time
Stick it in a folder. Future You will be thrilled.
A Word About Relationships (Yes, Really)
You know how they say you really get to know someone on a road trip? Well, remodeling is the extreme sports version of that. Whether it was your partner, your contractor, your neighbor, or yourself—you learned a lot.
You learned who panics and who powers through.
You learned when to fight for your vision and when to let the wall sconce go.
You probably learned a few new curse words (or invented them).
Forgive the tension. Laugh about it later. And if you worked with people who were amazing—send them a thank-you note. Or cookies. Or referrals. Kindness is part of good construction karma.
Final Thought: You’ve Built More Than a Home
A remodel isn’t just a series of design choices—it’s a reinvention of your space, your habits, your routines, and in a quiet way, your identity.
This house now reflects you. Your values. Your aesthetic. Your way of living.
And that’s what makes it beautiful.
Take a moment. Walk barefoot across your floors. Touch the tile you picked. Open the drawers you designed. Turn on the lights you installed.
Then smile.
You didn’t just remodel a house. You created a home